This week JEP 425: Virtual Threads (Preview) was moved from Draft status to Candidate status. While this announcement does not necessarily mean that JEP 425 will be a part of the upcoming Java 19 release, it reminded me that I always wanted to try the feature out. This blog post shows you how to set up an environment that allows you to try the current state of the project today.
What are Virtual Threads?
This blog post is not meant to provide a short, but complete summary of what Virtual Threads can do. If you are
interested in understanding Virtual Threads and the effect they will have on the JVM, you should definitely
read the JEP instead of a summary from some guys blog. If you are more of a visual
learner, there is a great deep dive video by Nicolai Parlog. If you just
want a short summary: Virtual Threads are lightweight threads which don’t map to operating system threads, like Java
Threads currently do. The Threads that already exist in Java will be called “Platform Threads” from now on, to make it
easier to differentiate between the two. While the java.lang.Thread API is carefully extended to allow developers to
use Virtual Threads almost exactly like Platform Threads were used already, there will be a major difference: When work
is done in Virtual Threads, it will be mounted to a Platform Thread, which will “do the work” (to be a little
imprecise). If a blocking system call is detected in this work, the Virtual Thread will be unmounted and the Platform
Thread is freed and can be used to process a different workload. After the blocking call is done, the Virtual Thread
gets, again, mounted on a Platform Thread and continues processing. The consequence of this behavior is that developers
can use the “Thread per Task” programming style for workloads that utilize a lot of blocking calls without having to
worry about blocking threads or having to use asynchronous programming models.
How to get started
As Virtual Threads are not yet a part of any released JDK version, we need to configure our workspace with some short steps if we already want to work with them. Keep in mind that this blog post is written in the early April 2022, and the versions mentioned here might be outdated if you are reading it at a later point in time (also: hello from the past!)
Download the Preview JDK
Virtual Threads are included in the Project Loom Early Access JDK builds, which can be downloaded on the
projects official site. If you have SDKMAN! installed, you can
install the preview build with the command sdk install java 19.ea.5.lm-open.
Install the latest IntelliJ version
To experiment with Virtual Threads I am using IntelliJ. As of today the latest IntelliJ version 2022.1 supports the JDK 19 Preview build, so I suggest installing it to have IDE support for your own experiments.
Create a project and test it
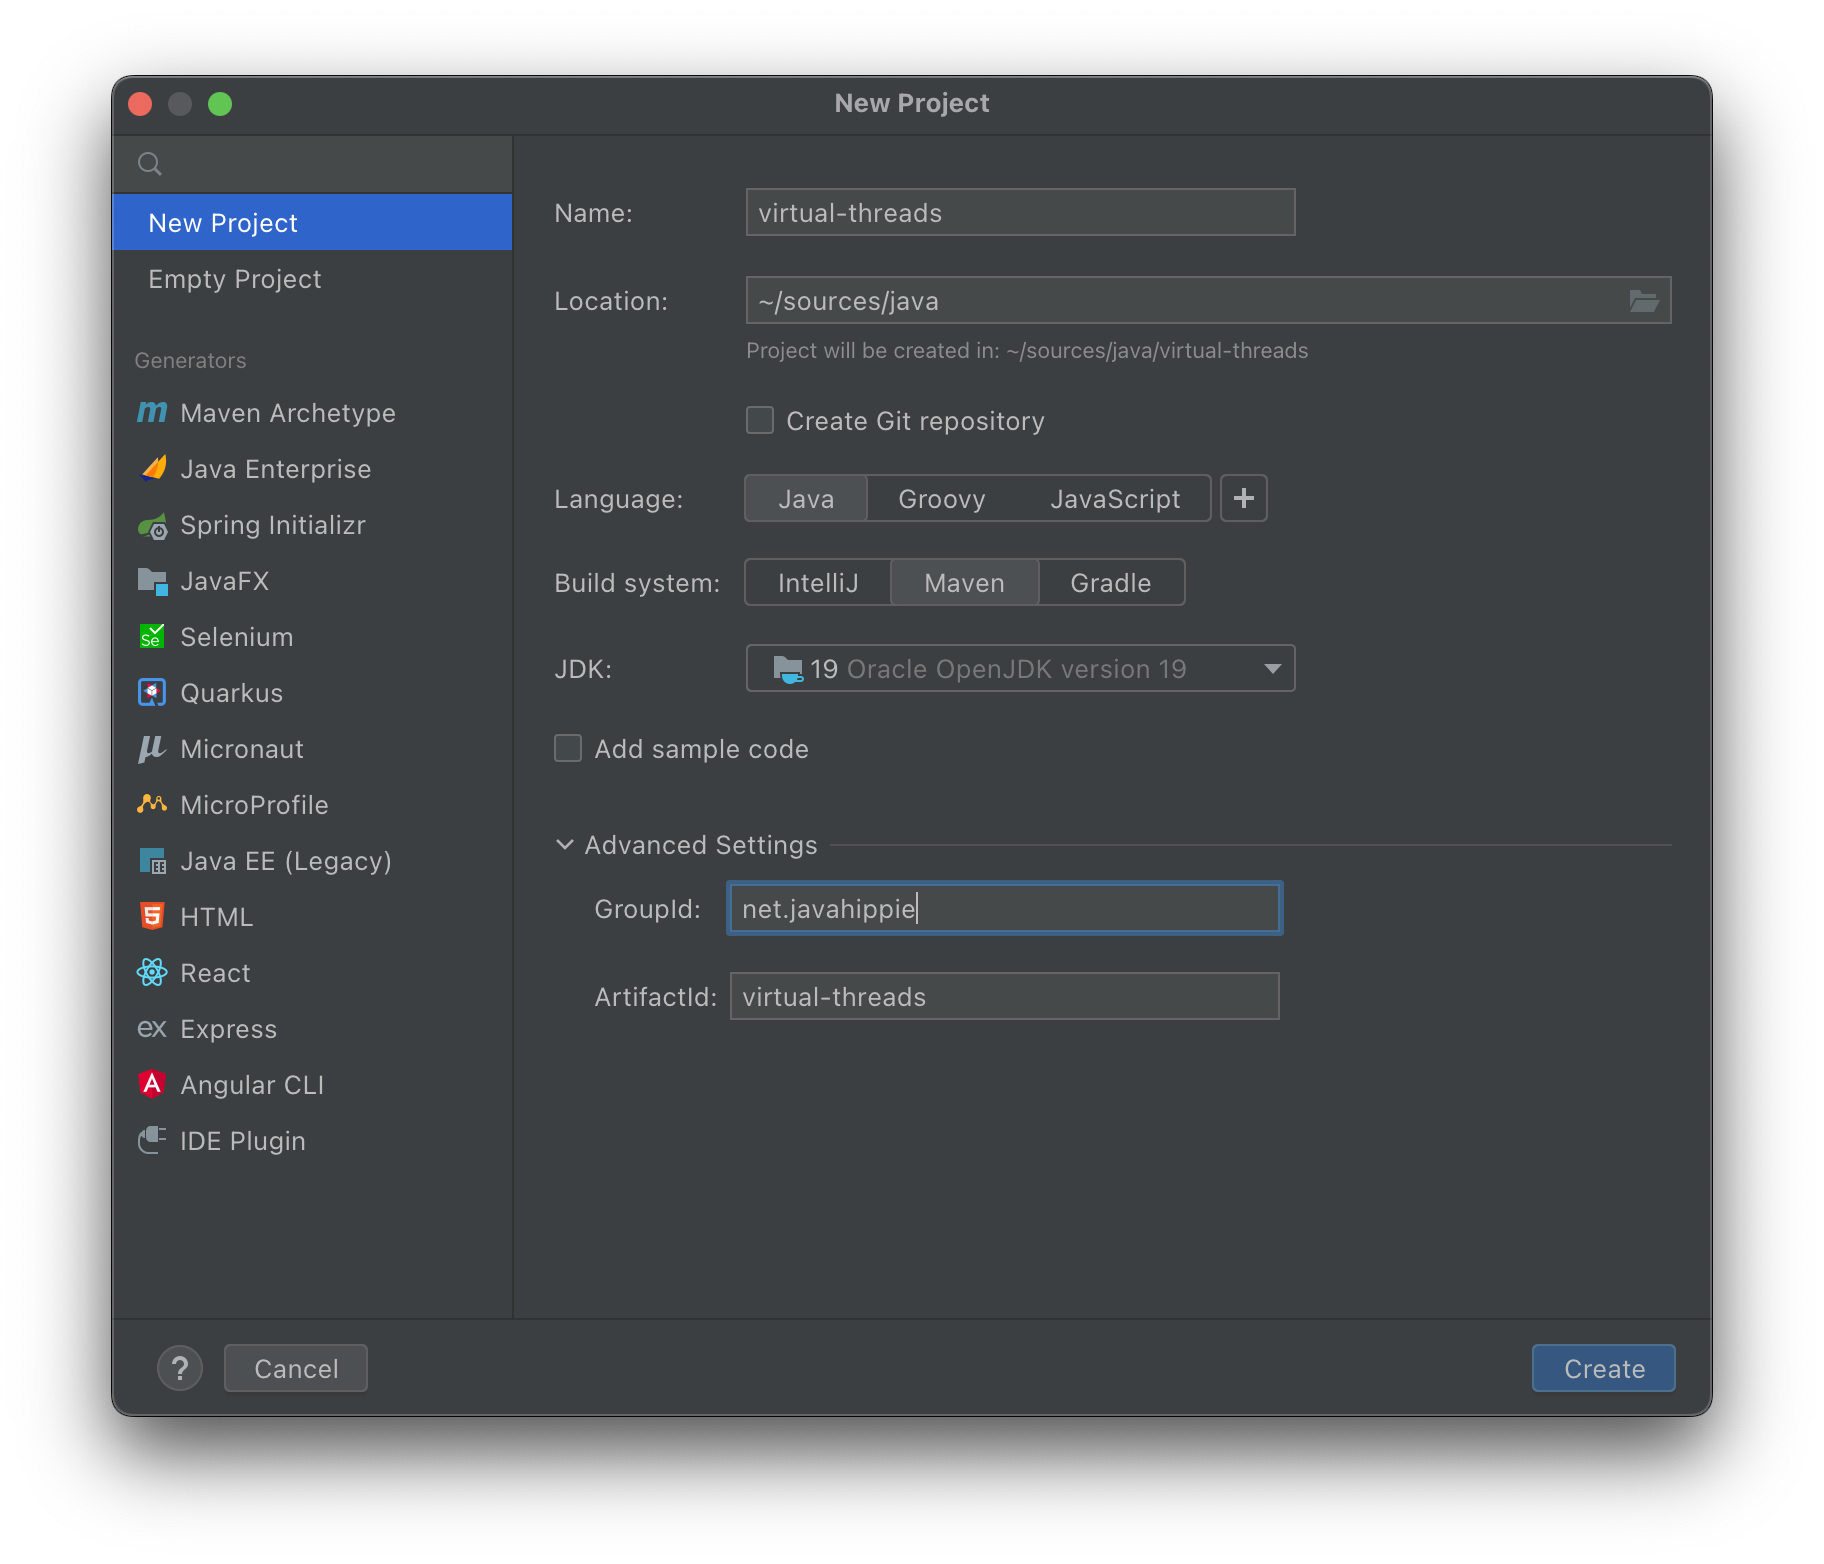
First we have to create a new Java project with IntelliJ. As you can see in the following screenshot I decided to use
Maven as the build system, the JDK 19 we installed earlier as the JDK. I also defined a project name and a Maven group
ID and artifact ID:
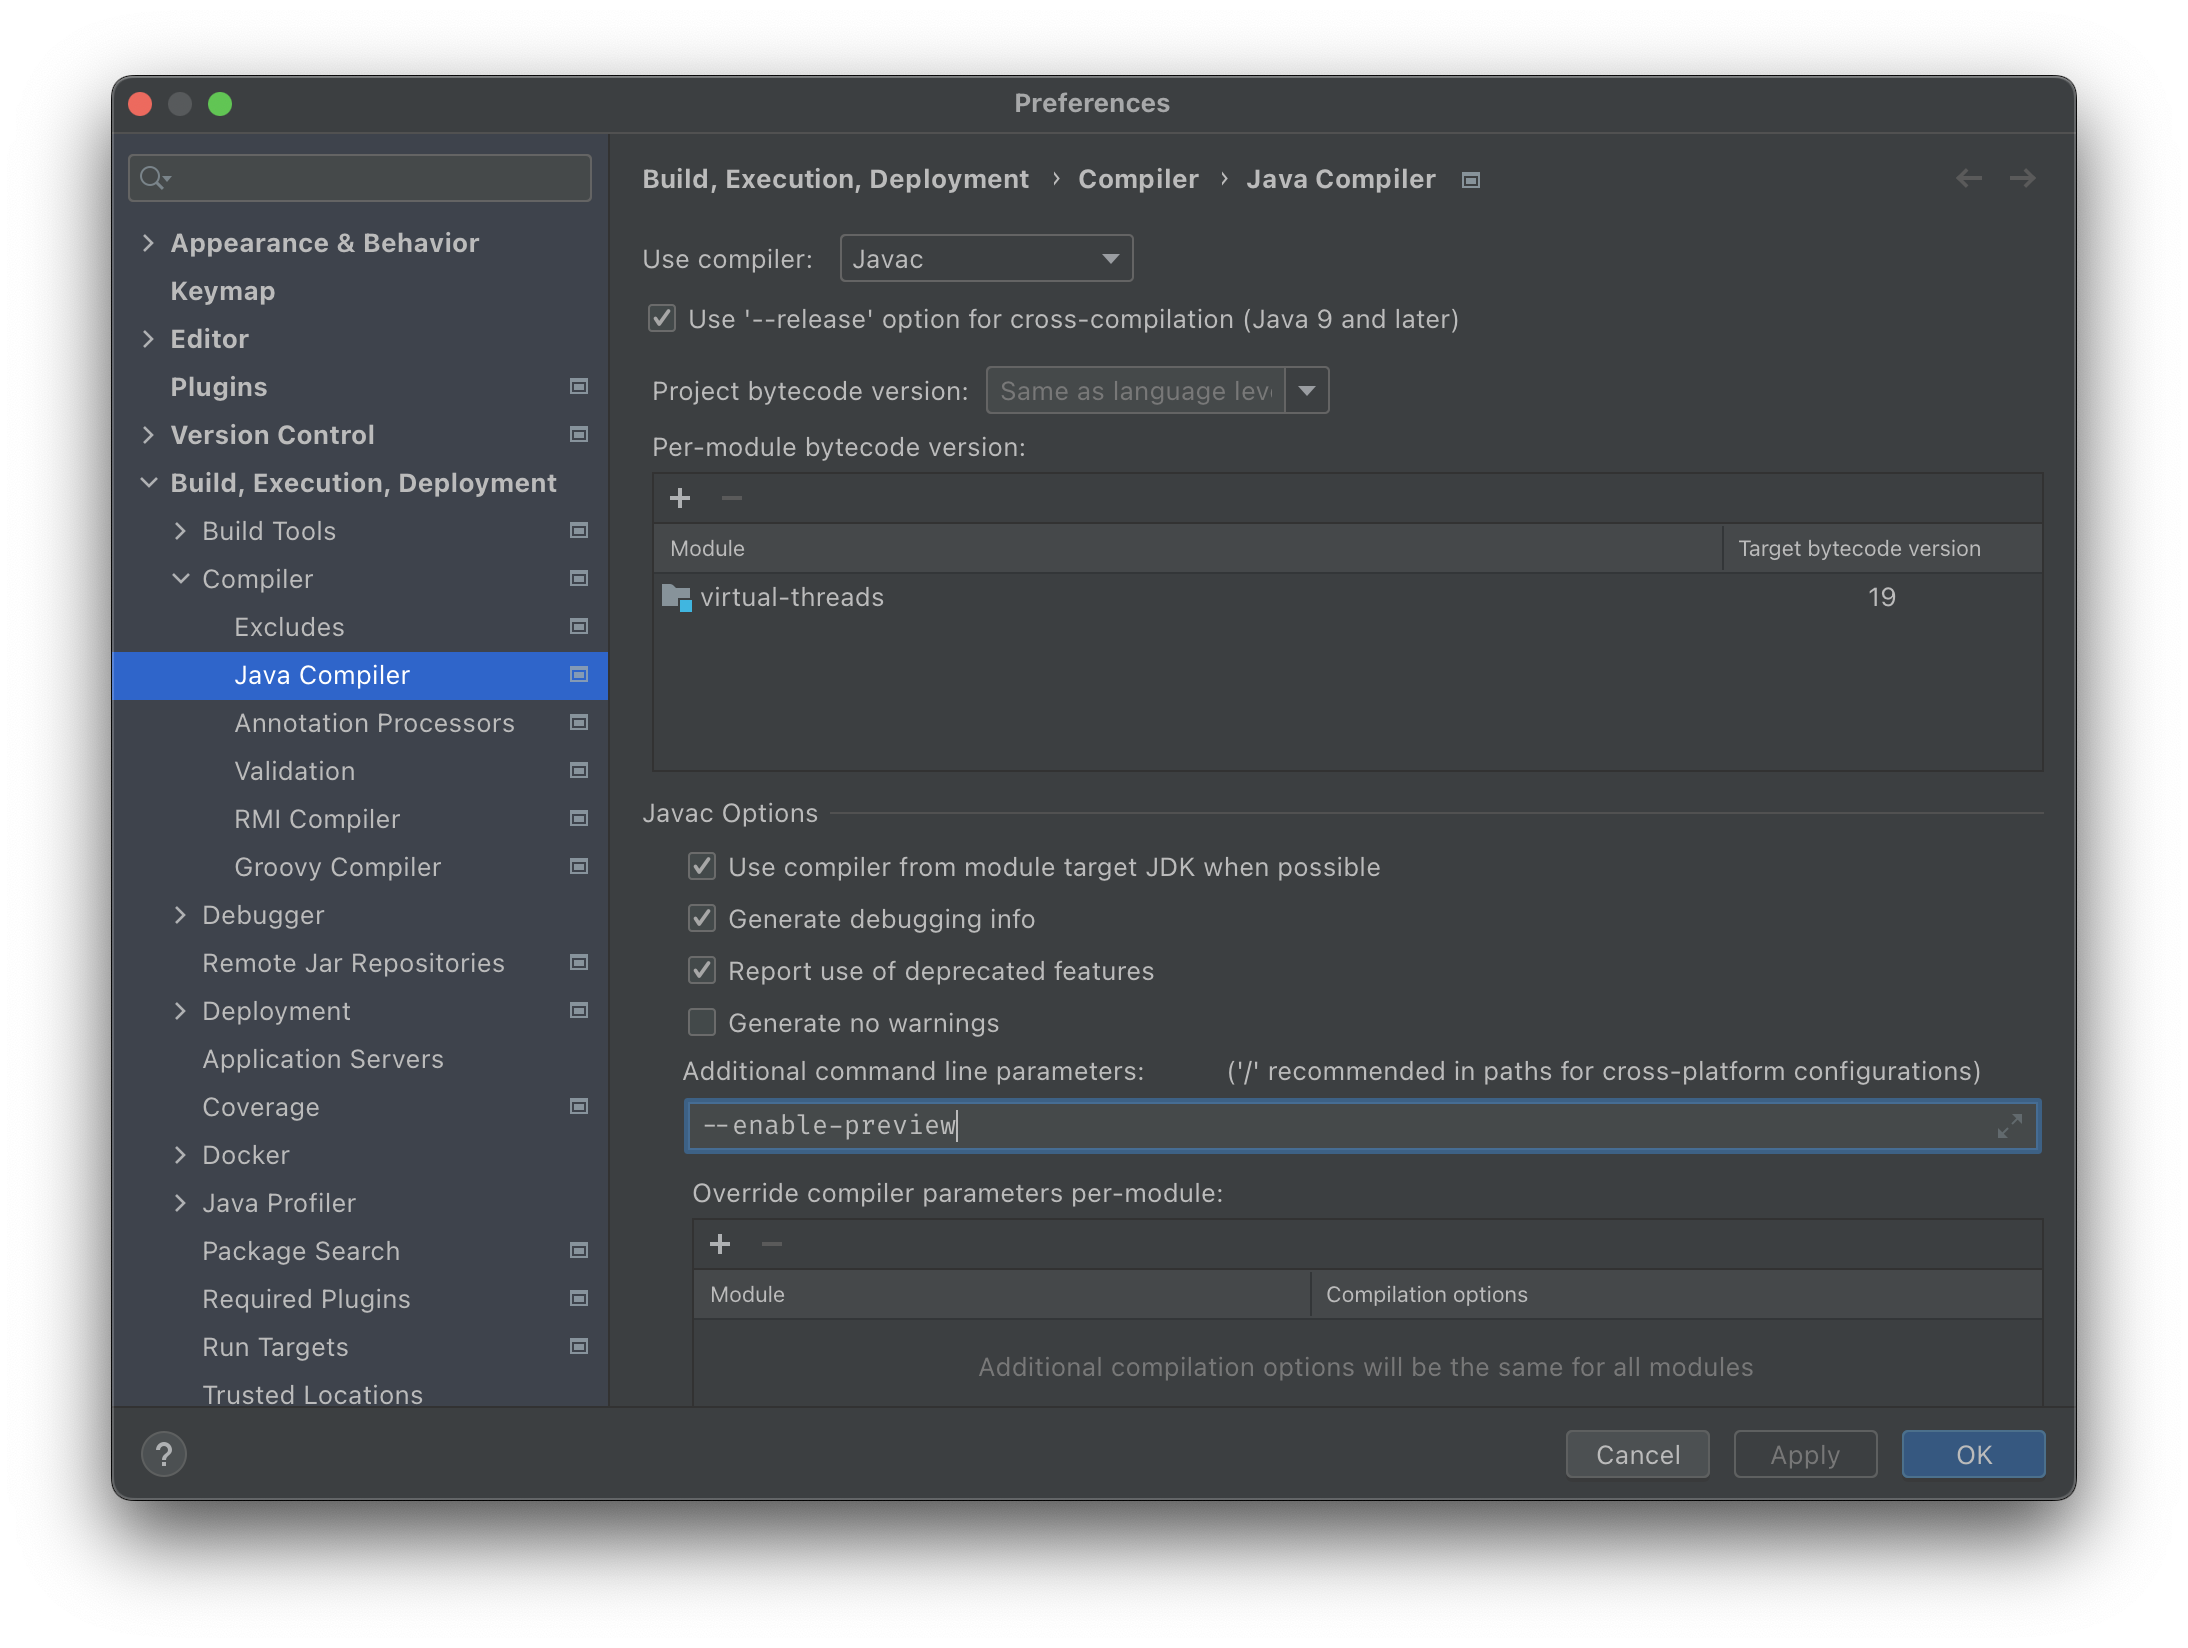
As Virtual Threads are marked as a Preview Feature, we need the flag --enable-preview to both our compile- and
run-configuration. To tell IntelliJ that it should compile the sources with this flag, we add it to the compiler
settings as shown in the following screenshot:
Now we can create a new class in our project. I simply called it VirtualThreadTest, and the contents are not that
spectacular:
package net.javahippie.virtualthreads;

public class VirtualThreadTest {

    public static void main(String... args) {
        for (int i = 0; i < 20_000; i++) {
            final int index = i;
            Thread.ofVirtual().start(() -> System.out.println("Printing: " + index));
        }
        Thread.sleep(1_000);
    }
}
We create a loop which executes 20.000 times. In this loop, we first assign the current index variable to a new final
variable which can be accessed from a lambda. After that we create a new Virtual Thread with the
method Thread#ofVirtual and start it immediately with a runnable which is represented in a lambda. Inside the Virtual
Thread we are simply printing a statement. This is not a feature which hugely benefits from Virtual Threads, but I hope
to showcase some of these features in later blog posts – this one is just for showing you how to set everything up.
After the loop is done, we pause the main thread of our program for one second, so we can see the output of all Virtual
Threads.
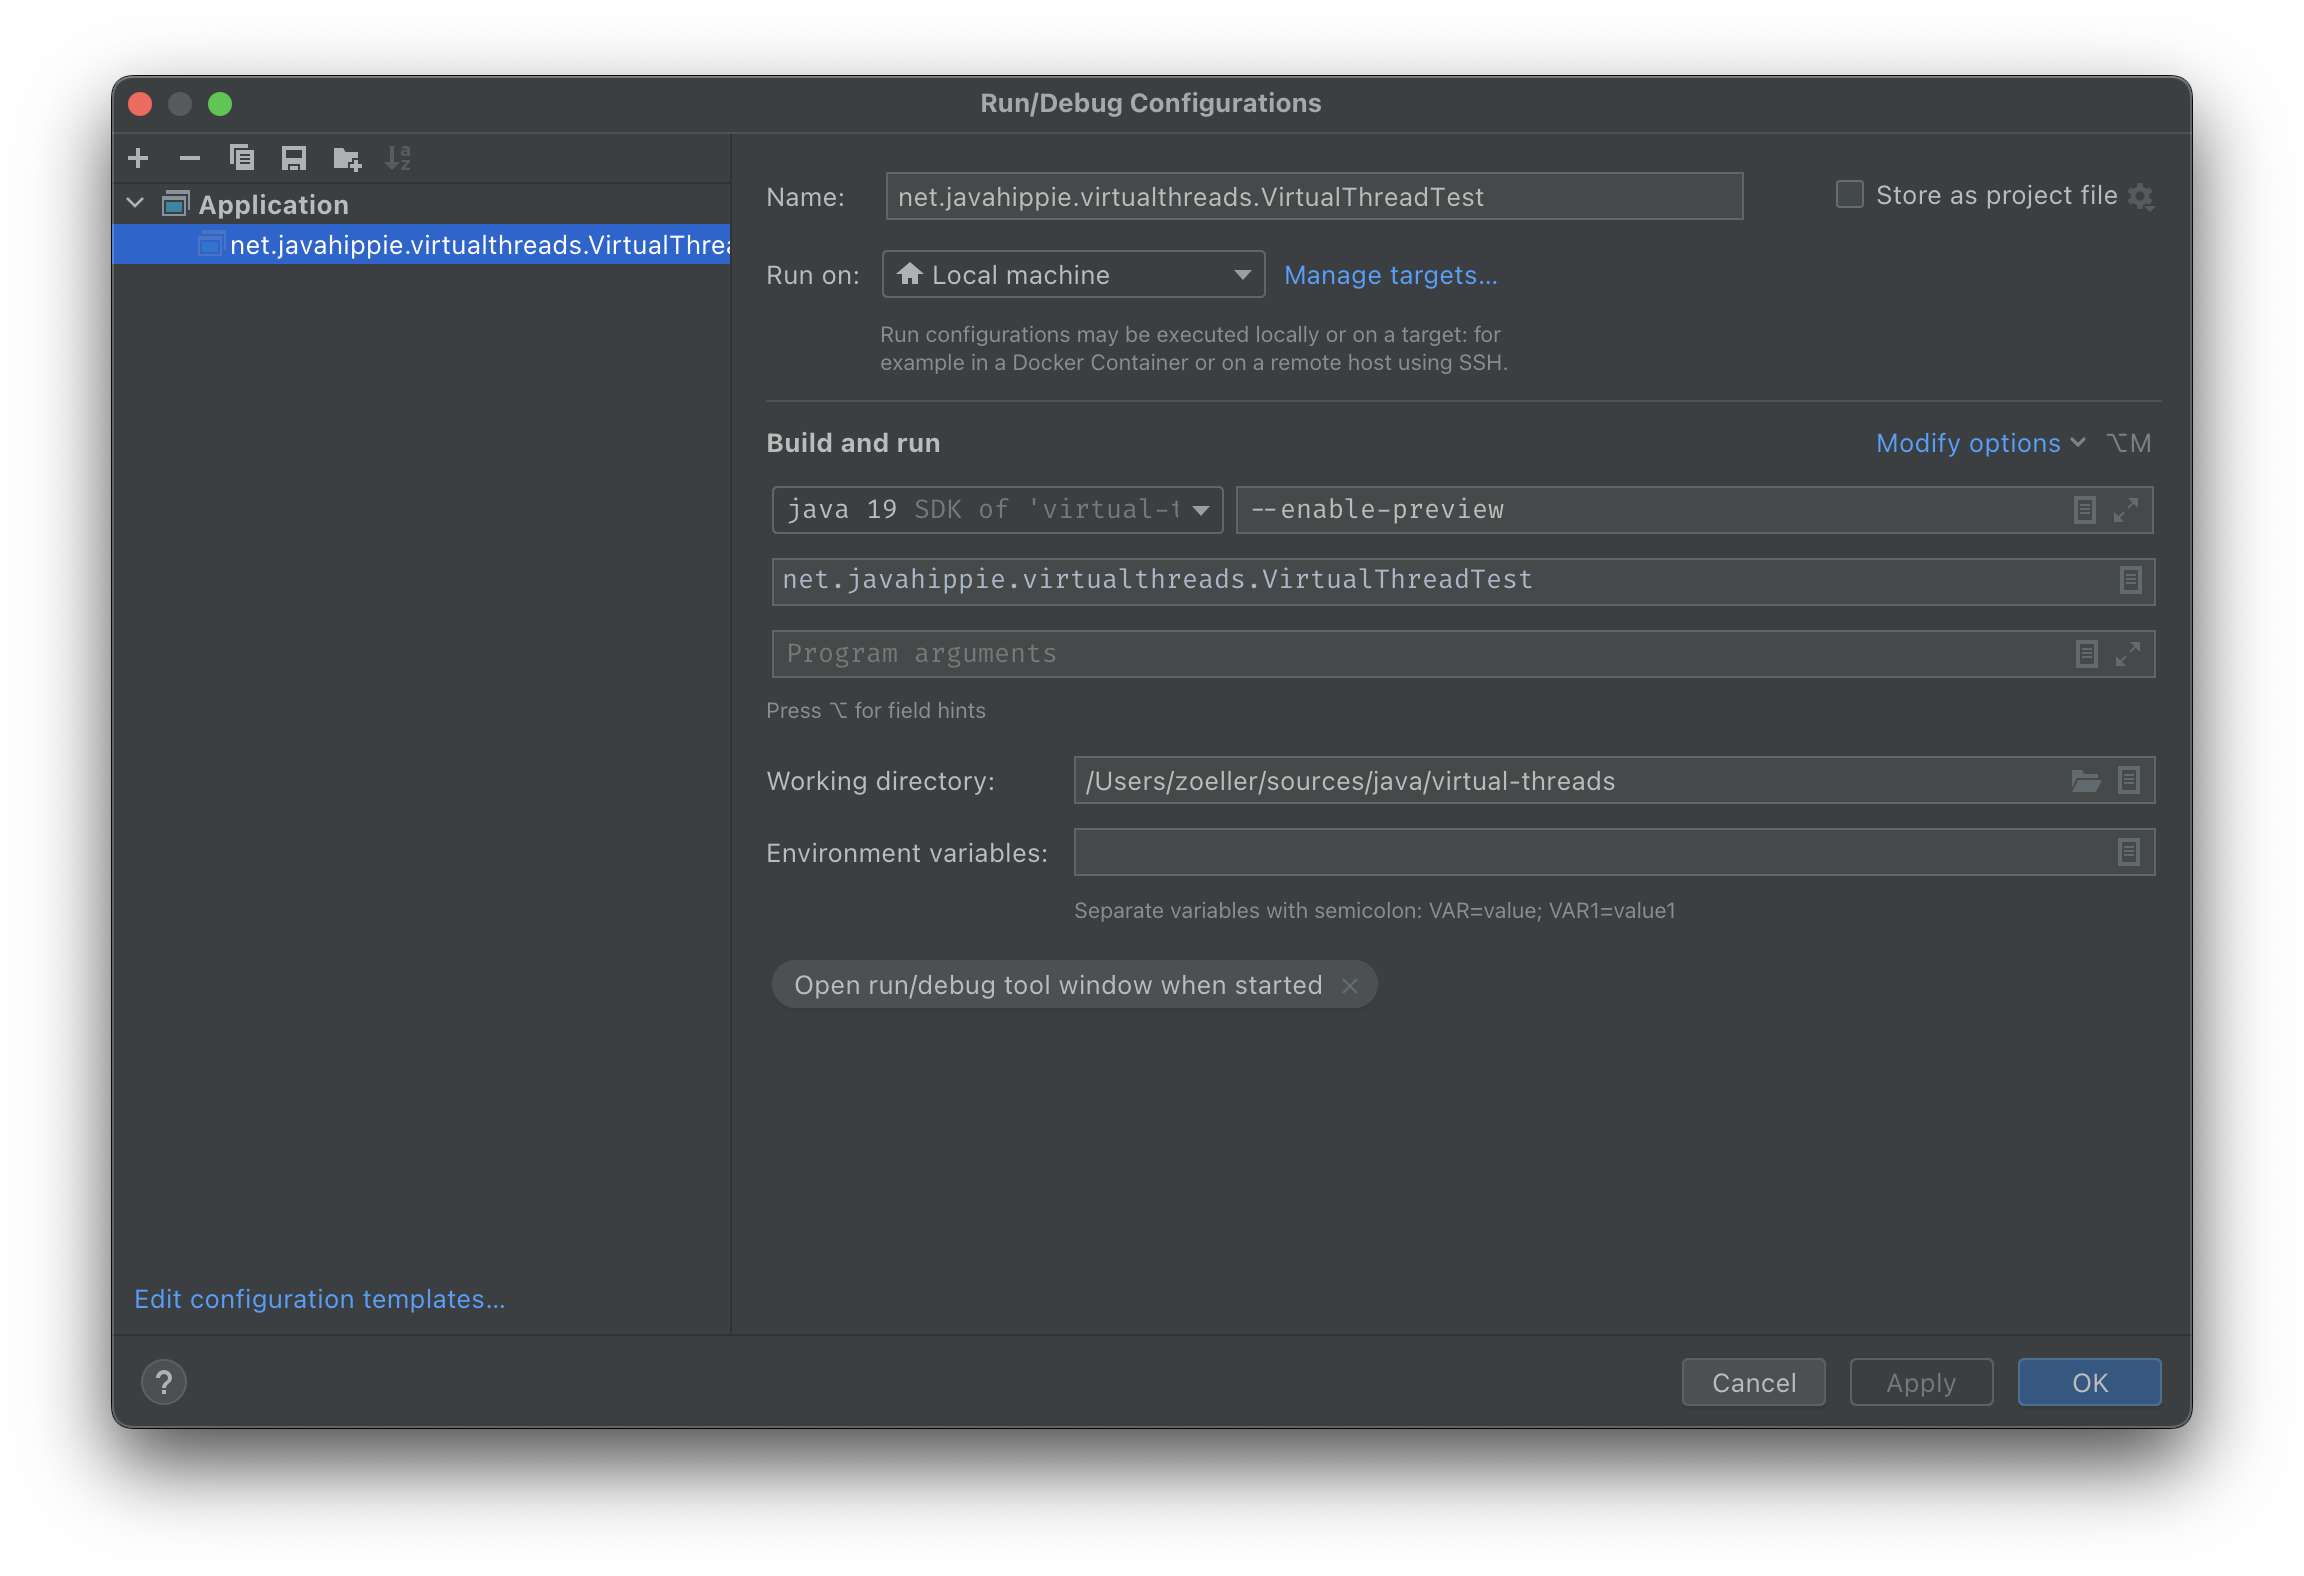
Before we can run our program, we have to create a run configuration and pass the --enable-preview flag upon start:
Now, when we start the program, we can see 20.000 lines of output before the program ends. We have successfully started our first ever Virtual Threads, congratulations!